Thursday 5 May 2016

The Finished Animation

Here is my animation for my extended practice. I have pretty much finished all of the animation but due to bad timing caused by sets not being ready on time and other issues that were out of my control, I have not had a chance to clean up the rigging and fix the flickering lights. 

I need to reshoot a couple of shots, including the opening scene as when I placed this in, it didn't look right and I decided to just place a still there for now. I will be going back into this before the exhibition. I will also be masking out the rigging and fixing the flickering lights before the exhibition too. I have all the clean backplates ready for this. 

I had a lot of issues with this project. My puppets kept breaking as the wire in them was prone to snapping. Really I should have splashed out on the more expensive armatures, but as I was working to a budget, I thought these would do the job. They held up for a couple of weeks of animating but towards the end, many limbs became dislocated as the wire snapped and they were very difficult to fix. 

I also had some issues with camera equipment and other people that I was working with and these put me quite a bit behind schedule, as my schedule was pretty tight to begin with.

Anyway, here is my animation. I'm pretty happy with how it turned out overall. 


Titles

Due to time and my limited ability with Premiere Pro and After effects, I have created a really basic opening sequence and closing credits. 

For the credits I just used a simple rolling sequence of all the people involved in this project and what they did, placed over a still image of one of the sets. This has a nice effect and is quite simple. 

For the opening title sequence, I had wanted to have the title 'Rumpelstiltskin' hanging from a branch as the camera moves through the trees, but none of the trees have branches on them as we kept them simple in order to get them finished in time. I then thought I'd just have the camera moving through the trees to then catch up to the miller and the daughter. I tried this but I couldn't work out how to make it look right and my attempts looked really shaky and strange. I would have liked to try and perfect this but as it's getting too close to the deadline, I didn't have enough time. I do intend to go back to it after the deadline and work out how to make this happen, but for now I have just used a still of the set and zoomed the camera in towards the wall in premiere. This will do for now but I do intend to re-do this before the exhibition and I will hopefully also have a nice title designed for me by then to put in too. I have just used a text that was provided in Adobe Premiere.

Tuesday 26 April 2016

Editing.

The editing and post production side of my animation shouldn't take too long. I didn't use any green screens, and the scenes are all quite dark, meaning that things in the background wouldn't be seen anyway. This will save me a lot of time with editing. The only things that do need doing are masking out the rigging that is visible in some frames, and adding in a light source in the camp fire scene, and fixing the flickering light in a couple of frames.
 Unfortunately I will not have time to do this before the deadline but will have it completed by the exhibition. 

I also have been editing together the completed scenes as I go and some have required moving the camera around in post production and zooming in or out depending on the shot as I cannot zoom on the camera I am using. I have also been adding sound effects to help tell the story, which I have been doing for each completed scene in the evenings.

Finished Puppets.

I've completed all of my my puppets outfits. Luckily, the daughter, the miller and Rumpelstiltskin all have clothes that are supposed to look quite hand made, which is good because my sewing skills aren't amazing. 

I had a lot of trouble with the Millers clothing, as the arms kept coming loose while I was trying to sew his top and then the wire that made up his neck and spine snapped, forcing me to undo all of the stitches I had already done and take apart the sponge and the armature again and replace the wire. This was an inconvenience but hopefully the wire should hold now. The arms still have a tendency to become loose and fall out of their sockets which will be annoying if it happens when animating, but the Miller doesn't have to move too much in the animation and I have made it possible to get at the arm sockets without having to unstitch too much of the puppet now.

The main issue I had with the King's puppet is that his forearms dont like to stay attached to his elbows, meaning he doesn't animate very smoothly but I think I can get around this with some creative angles.

The Rumpelstiltskin and Millers Daughter puppets worked the most successfully and both have a good range of movement. The only issues with this are that the hands don't move too well as the wire keeps poking through the silicon. This could have been solved by me putting a blob of glue from a hot glue gun on the end of each finger before casting, which I will do next time I make a puppet. 

Plan for the last week and a half.

There is just about a week and a half left of this project before the deadline so I've had to extra organise my time as I have gotten a bit behind with the animating. I think I can get it done in time though if I stick to my schedule. I have the lights and equipment until next monday so I have planned to have the last few scenes done by then, and I'll add the sound in the evenings. This should hopefully give me a chance to clean up a couple of bits in the last two days or give me two days to finish things off if something goes wrong and things dont work to plan. 


Plan for last few scenes.

Friday 29th and Saturday 30th (doing this last as it should be pretty quick and isnt the most important scene)

0:00- 0:07 camera slowly moving through the forest

0:08- 0:10 (camera behind characters) camera catches up to Miller and his daughter as they walk through the gate. Miller walks holding his sore back, daughter walks slowly and sadly just behind him.

0:10- 0:15 Camera just behind the king, to the side. miller bows before the king, looks up and presents his daughter. (king takes girls arm and turns towards the castle?)
(scene done in one day easily)

0:15- 1:19 done.

Wednesday 27th (After PPP) and Thursday (after crit) if needed.
1:19- 1:23 girl with crown on her head, sweeping hair behind ear while looking down. 

1:23- 1:27 girl holding baby.. pacing back and forth? (tie down holes) rocking baby? 

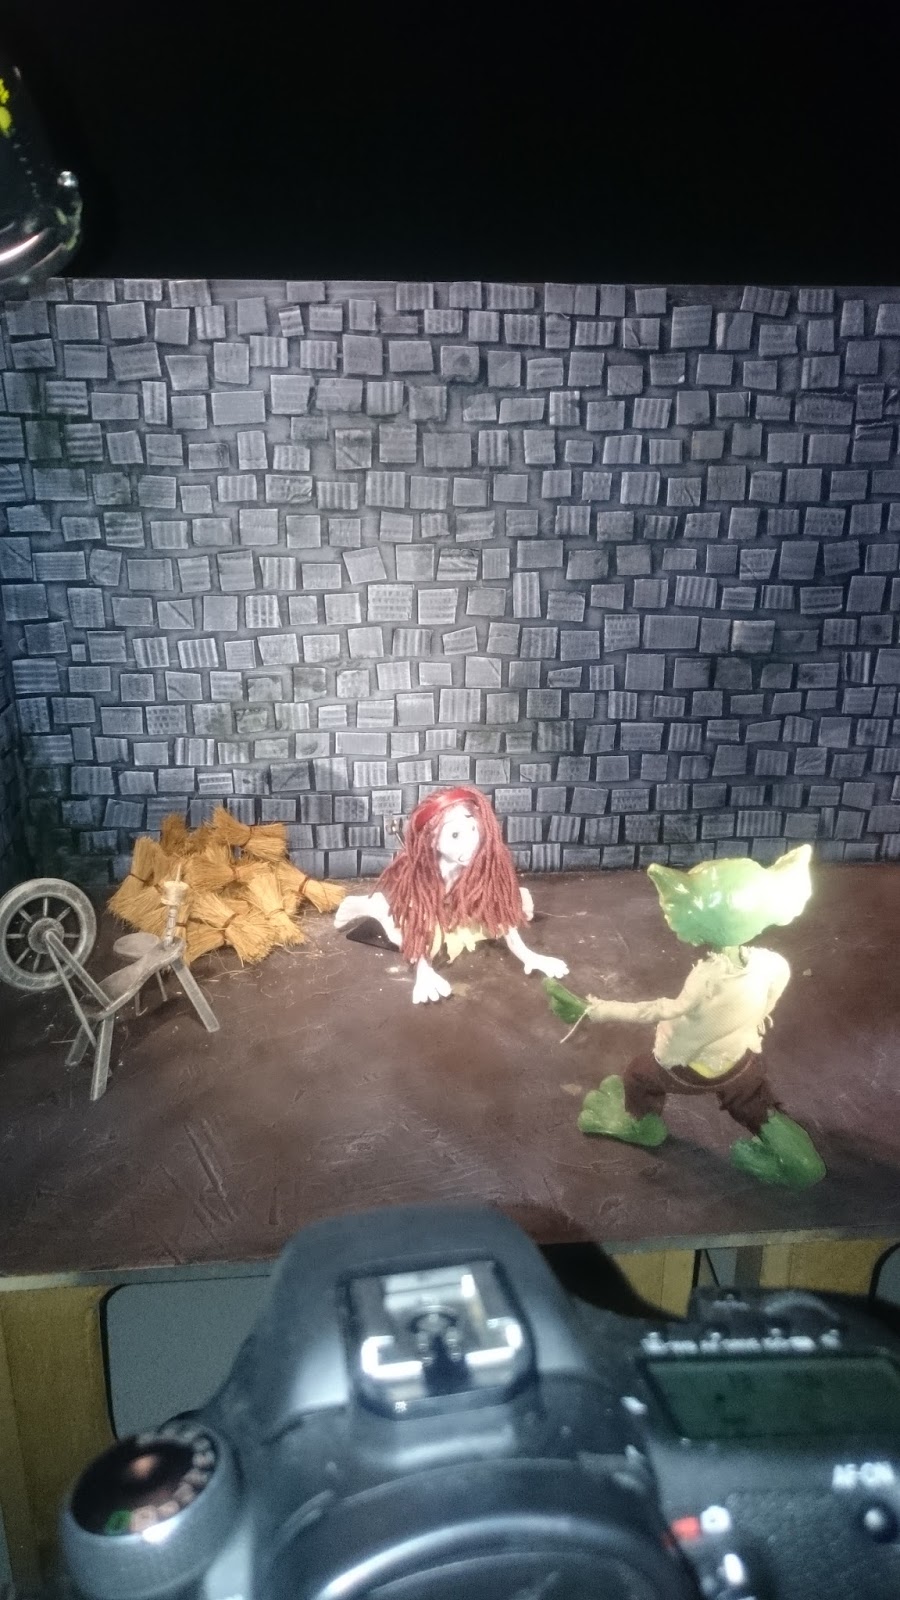
1:27- 1:31 cut to shot of Rumpelstiltskin walking up through the gate, he bows and then holds out hands for the child. 

1:32- 1:34 shot of both. Girl pulls back, holding baby protectively as Rumpelstiltskin holds out hands for the child. zooming in on girl towards the end

1:35- 1:40 girl turns and collapses on her knees, holding the child close and crying.

1:40- 1:43 shot of both of them, girl is crying on the floor, rumpelstiltskin looks thoughtful.strokes chin? has an idea!

1:43- 1:47 Rumpelstiltskin holds up three fingers, girl wipes her tears away and looks hopeful. Rumpelstitlskin turns to leave. camera moves to focus on him.

1:48-1:50 Rumpelstiltskin leaves. Shot of his back walking through the gate.

1:50-1:54 Girl pacing back and forth in front of castle (use same tie down holes as before) 
(whole scene in one day? Day and a half?)

1:54-1:55 fade to black.

1:55- 2:08 done.

Thursday 28th (after Crit) and Friday 29th all day.
2:08- 2:12 Rumpelstiltskin walks two steps up to the girl and bows, with his head low. Last second he looks up with a cheeky grin.

2:12- 2:18 cut to shot of girls upper body. eyes half open, half smile on her face, one hand thoughtfully in the air as if she’s thinking.

2:19-2:22 cut to shot of both of them, girl leans forward, eyes closed , smile on her face. See Rumpelstiltskin from the back still crouched down with this head tilted up looking at her.

2:23- 2:29 cut to shot of rumpelsiltskins face change from grin to shocked as he gasps and falls backwards.  (all in 3 hours)

2:30- 2:32 cut to shot of back of girl with rumpelstiltskin in the background. Girl turns away and heads back into the castle. we can see rumpelstiltskin in the background not fully in focus as he gets to his feet and begins stomping around in anger.

2:33- 2:39 cut to a shot of rumpelstiltskin stomping around angrily. one foot gets stuck in the ground. 

2:39-2:42  slightly closer shot as he starts pulling at the leg stuck in the ground. 

2:43- 2:46 (swapped puppet out for a plasticine one?) close up of the legs, he pulls at the leg more and then it flies free straight up, ripping noise.(whole scene in one day?)

Friday 29th

2:47- 2:48 shot of Rumpelstiltskins head, (or whole puppet in two halves?) eyes closed, lying on the floor. fade to black. (10 minutes tops, its just one shot, nothing moves.)


It is quite ambitious to aim to get 30-40 seconds done in a day but they're mostly not too elaborate so it could be possible. If not, I have a few days spare to sort it out and finish it up. I will then hopefully have time to do some editing like adding in lights in after effects and cleaning up the rigging, hopefully before the deadline but if not definitely before the exhibition.

Saturday 23 April 2016

Set Built: Castle

Elliot is building my sets. To make the castle, we measured out and bought a large piece of MDF to be the base of the set. I also had a fair bit of cardboard that Elliot thought he could use for the castle. We put it in the stop motion room in 210 which is where I'll be animating and Elliot will be building the set. We measured out the cardboard to find a rough height for the castle and the walls and sketched out roughly where the path and trees would be. I then left Elliot to make a start on the set.


Elliot had gotten a bit behind on my sets, so I had to help out with this set as well so that I could begin animating on it. We used a large piece of cardboard as the castle, drew on where the door would be and then I covered it in bricks also made of cardboard while Elliot did a similar thing with the towers. I also used strips of cardboard on the door to act as planks of wood. Then, while Elliot was assembling and bricking up the wall that goes between the forest and the castle, I covered the board in PVA and soil to give it a forest floor texture. I used a thinner layer of soil for the path and inside the castle grounds so that it was easier to see the difference and easier to drill through for tie downs.
Once all the assets were assembled, we took them outside to spray paint the base coat of black on them. Once the base coat was dry, elliot mixed up a brown coloured paint with some PVA and a little water that would help the paint cover and stick to the soil texture, and we began covering the board using a dabbing technique. We did two to three layers with slightly different colours to create depth and texture to make it look good on camera. We then dry-brushed three layers of different greys (dark to light) on the walls of the castle and towers and outer wall to create the impression of worn in brick. I used a similar effect with the wooden door to create a wood texture.


Monday 18 April 2016

Animating.

Some problems I have come across while animating have caused me to slow down and rethink things. I found that, although three of my puppets came with strong magnets to hold them onto sets, once the silicon had been applied to the feet, the magnets weren't nearly as strong and they weren't able to get through the wood of the set and the silicon, so are basically useless for animating with. This means that I will have to use the tie downs for these puppets which will mean drilling holes through the set where I need them, which will take more time. I also had planned to use a rigging kit for the king puppet, however the rigging kit doesn't attach to the kings armature as planned so I have had to slide it between the sponge and his clothes and hope that is strong enough to hold him. This will make it more difficult to animate with. 

As I didn't know how a spinning wheel worked, I have looked for some videos as research and found this very useful video and have used it as reference so that my Rumpelstiltskin character looks like he is in fact working the wheel. 


As I have limited experience in animating in stop motion, some of my movements are quite shaky and the light occasionally flickers and I can't work out why. The shaky movements aren't too much of an issue for me, but the light flickers I will need to clean up in post production.

Another issue I faced with this animation is working out how to make the campfire look like it was giving off light. I bought some little LED candles that I thought might be useful, however they are too bulky to sit above the set inside the campfire as it was too obvious that they were there, and the LED light bulb itself wasn't big enough to show through the wood if we had drilled a hole through the set and attached it underneath. Because of this I have decided to add a light source in in post production and maybe footage of a fire inside the set. 
The biggest issue I have had with this animation is the King puppet, as I couldnt attach his arms properly and his bulky shape make it hard to position his arms without them springing back again. 


The last issue I have had is the Rumpelstiltskin puppet. At the end of the animation he is supposed to tear himself in two, and originally I was planning on making a duplicate puppet that was in two halves, loosely held together by clothing. Unfortunately, I ran out of silicon because the first Rumpelstiltskin puppet didnt work, and I have run out of time to order new silicon and make a full new puppet. 
Therefore I have had to think of a new way to do this last scene. I had wanted the audience to be able to see the whole scene as it would have been a fun challenge, however because of a lack of time I think I will either have to make a plasticine puppet that maybe wont look exactly the same as the original puppet, or, to save more time and definitely get the animation finished by the deadline, I could just make use of creative angles to shoot the scene at to make it look like he might have torn himself into two. I think because of the time I have left, I will go with the second option and show a shot of Rumpelstiltskin pulling at his leg, use a ripping sound effect and then show Rumpelstiltskin lying maybe in pieces on the floor.


Monday 11 April 2016

Sound.


I asked a good friend of mine from home, Sam Benjafield, to create the sound for my animation as he is a talented student at Ravensbourne, London studying Music Production for Media. He specialises in creating music scores for films of all kinds but particularly likes dark creepy film scores and so it seemed a perfect fit. He also said he needed more diversity in his showreel and an animation would be perfect as all the other films he has done are live action. He has worked with me before in first year creating some music for one of my idents so I knew he'd do a good job. 
Here is a previous film with a music score created by him.


Sam likes to work to the footage to best fit the music to what is happening in the story. This meant that I had to send him either the finished animation before he could start sound, or part animatic with finished animation elements so that he could see how the story moves. 


He sent the music the other day to see what I thought about it and if it needed changing. I thought it sounded really good, however I thought it needed to sound a bit more dramatic and sad as the beginning sounded too happy. I also asked him to extend it by about 10 seconds to include the closing credits at the end. 


He sent me the finished sound today and it sounds great. 


Wednesday 6 April 2016

Set Built: Tower Room


Elliot has completed my first set. It was a little behind schedule but I don't think it will be too much of an issue as I gave myself a little extra time in my plan. I will just have to animate at a decent pace. 

The set looks amazing and I love the spinning wheel that he built. I also like the green splodges he did on the walls that look like damp or mould growing. I'm very pleased with this set. 

One issue is that I forgot to tell him to include a door but I can just use some camera shots and lighting to make it seem as though there is a door, and rethink a couple of panels from the storyboard. This could actually make it easier to animate.


Friday 1 April 2016

Setting up the lights


Every scene in my animation will have quite dim lighting, however what the lighting on the set looks like to me is not what it looks like from the camera, so I have had to set the lights up quite bright and then they come through looking quite dark. This took some fiddling to get it looking how I wanted it to look but I'm happy with how each set has turned out. 
I also had to work out where I wanted the light source. I used a big LED light on quite a low setting to give the basic lighting so that the set was visible in the camera, and then used one or two little Dedo lights to highlight the characters/ act as windows or doors in the tower room set.

I tried to give the lights a nice warm glow using the settings that they offer. This is because the scenes were pretty much all meant to be lit by candle or fire, with the exception of the woods in the castle set. 


Tuesday 22 March 2016

Set Built: Forest

As I was finished with the first set before the Forest set was completed, I decided to help out to make sure it was done as soon as possible so that I could get back to animating. It has taken two days out of my schedule, making me a bit further behind but I still think I can get this animation done in time for the deadline. 

First, we had to make some trees. We were lucky enough to find some tubes with bark-like texture at the S.C.R.A.P place, and we bought 6 of them which was enough trees for this set and we plan to reuse them for the castle set. We paper-mached some roots onto them to help them stand up, and secured them onto the board by attaching some foam to the board that was the same size as a hole we had cut in the bottom of each tube. This meant that each tree was easily removed without damaging them or the set, but wouldn't move if knocked while animating. We used PVA glue and covered the floor of the set with soil to give it a good texture and then spray painted everything with a black base coat. Once this was dry, we painted all the trees with a couple of layers of different shades of brown paint to give it a good texture. We then painted what would be the inside of the ring of trees a slightly more orangey tone to give the impression that the campfire that will be in the middle was lighting them. We did a similar thing with the soil, painting it warmer in the middle of the circle, and then elliot used some pebbles to create a ring where the fire would be and some sticks to make it look like a campfire. 
We then had to use some moss and sticks to hide the base of the trees as the paper mache had warped a little, making the bottom of the trees look strange.


Monday 21 March 2016

Puppet Costumes

I bought a selection of materials from S.C.R.A.P that I thought would work well with each of my characters. I was able to cut just enough of each fabric and it was so cheap, S.C.R.A.P is just the best place to buy materials for my puppets.

I decided to sew all the costumes myself as I have never really sewn anything before and decided it would be a useful skill to have. most of the costumes were pretty straight forward, although some of the materials were difficult to work with. Some of the materials frayed a lot, particularly the ones used for Rumpelstiltskins outfit. A little bit of fraying wasn't an issue as it adds to the look of the character, so I hemmed the materials to stop them fraying too much and then cut the jagged ripped look into them.

The first puppet I completed the outfit for was the Miller. This puppets clothing was the worst of the four because it was the first, however he just looks a bit ragged and rough, which works for the look of the character. It also isn't too big of an issue as he has the smallest role in the animation.

With Rumpelstiltskins outfit, the biggest issue I had to overcome was the fact that when casting the silicon, the arms didn't get fully filled out somehow, so I decided to adjust the outfit in the character design to give him longer sleeves to save time and money recasting the silicon again.

The Millers Daughter's puppet was the easiest puppet to clothe, the only real issue I had with this costume was the corset because I found it really difficult to fit it correctly to make the right body shape. I also had issues with the low cut neckline as it was really challenging to get the material to sit and stay where I needed it to.


The Troll King's costume was easily the most difficult. I had a lot of trouble fitting the robe/ cloak and making it sit the right way. I also had trouble with the shoes, as I had to make the fake leather material fit both the feet and the legs as they are boots and it was very difficult to make them look right. 


Thursday 17 March 2016

Crit and Feedback

I had a crit today on everything that I have done so far. The feedback I got was really good and everyone seemed to like my project.

No one really had many comments to make about what I could be doing better but Annabeth suggested a  couple of good ideas for how to do the fire in the forest scene. 
She suggested some plastic LED tea lights to create the glow and a small fan underneath with some thin strips of coloured acetate or thin film attached to the sticks to give an impression of fire.

Props

I have been thinking about props. I thought I might be able to buy some of the props from ebay or etsy but i've been having trouble finding things that would be the right size. I was hoping to find the spinning wheel in particular as it would be most difficult to make but I could only find one that would be bigger than my characters and the others were all too small. I have asked elliot to make my spinning wheel out of wood. We bought some wooden curtain rings that we thought would be the right size for the wheel and some lollypop sticks and scraps. Also maybe a stool for Rumpelstiltskin to sit on while he's spinning.

I did manage to find some gold wire which I think will work well for coils of gold after Rumpelstiltskin spins the straw. I had to pad out the reels of gold with gold coloured plasticine as there wasn't enough gold wire to look like all of the straw was spun. I also bought a wooden brush head with bristles that I think will work well for straw. It's should be thin enough and the right texture to look like straw in the scale of the set and it's already the right colour so I plan to cut chunks of the bristles off and tie them into bundles with thread. 

Another prop I had to consider was the camp fire. I bought some little LED tealights that should fit inside the fire to give a little flickery glow. I was thinking we could drill a couple of holes underneath the campfire in the set and attach the lights underneath the set. This would mean the light would start at the bottom of the fire instead of half way up which would look better. 

I also need a baby, so I made a little babies head in plasticine, padded out the body with sponge and bundled it up in cloth. Hopefully the head wont be too visible, it just needed to look like there was a child inside the cloth. 

The only other props I need are two crowns, one for the king and one for the girl when she becomes queen. I was thinking of just making them out of air drying clay and painting them, then attaching some of the white trim that I will use for the kings cloak to the rim of each crown.

Wednesday 16 March 2016

Animatic

I have put together a quick Animatic using the storyboard panels that Sophie sent me, and the voice over that I recorded the other day. This will give me an idea for timings and how the animation will flow, and also will help me to work out what I want the music to sound like so that I can send Sam this file and a page of cues. 


Tuesday 15 March 2016

Storyboards


Sophie has finished the storyboards and mostly happy with them. There are a couple of shots that I will need to adjust slightly, like the shot where the girl becomes queen and is greeting her subjects, because I feel like this shot is unnecessary and I wont be able to make or animate a bunch of hands waving back at her. I also wont be making Rumpelstiltskin a hat and the last two boards after Rumpelstiltskin tears himself in two won't be included as they weren't part of the story, Sophie just added them in and I want the story to end at the scene where he tears himself in two as it's more dramatic. Other than these few changes, I am really happy with the storyboards. I now need to put the boards into an animatic with the voice over that I recorded the other day to work out the timings and cues, which I can then send to Sam to do the music.


Monday 14 March 2016

Puppet Casting: Resin Heads and Painting

Once the silicon had set, I took them out of the plastic and had to cut into the blocks for the second two heads with a sharp scalpel to get the plasticine heads out of the middle. I did them with zig zag lines so that the moulds can spring back into the same place. The two part moulds were just separated and cleaned when the second half of silicon had set. I didn't do a plaster jacket for the second half because the silicon was strong enough to hold its shape without a jacket, unlike the first half.


 Once the moulds had been sorted, I made sure the Resin couldn't leak out by putting tape around the one part moulds to hold them together, and the two part moulds I had to secure by putting a wooden board on the non-plaster side and securing the mould together with an elastic band. I tried it without the wooden board but the elastic band pulled the silicon too tightly in the middle and left a gap at both ends so the board helped even out the pressure. Once both moulds were secured it was  time to add the resin. Resin is very hazardous and so I had to wear goggles and gloves to protect my eyes and hands from possible splashes. To mix the resin, I first had to pour the resin into a cup on the scales, measuring out how much I needed to fill each mould. The catalyst was then added which makes the resin cure. I had to add no more than 2% catalyst, otherwise the resin will generate too much heat while setting and would turn it yellow instead of clear.
Once it was mixed, I poured it carefully into each mould and then took them to Leon in Metalworks to use the vacuum former to get rid of any bubbles that might have formed inside the mould. I only did this for the first two moulds as Andy said after this that, as I'm painting the heads, the bubbles wouldn't be visible as they will be right in the middle and never rise to the edges.


Andy has warned me that when resin has set it can still be quite tacky and sticky for a few weeks, but suggested that I could take the heads to Leon and ask him to bake them in the oven for 30 minutes which will stop them from being tacky. This will allow me to paint them sooner. 


 The four heads have come out of the moulds just fine, a couple of the have little issues but nothing that can't be easily fixed before painting. The Rumpelstiltskin head has a couple of air bubbles on his chin but they've just caused holes which I can fill in and cover with paint. The Millers head is missing a tiny piece of his moustache but it will be easy to level it out. The girls head easily came out the best and I think that is because the mould was the simplest and smoothest. The Millers head came out slightly yellow which is apparently what happens if the resin overheats while curing. This would be because slightly too much catalyst was poured in when mixing. Fortunately this wont affect my puppet as I will be painting over it.
I put all four heads in the oven in metalworks for half an hour then left them to cool down over the weekend. 
Once they were cooled, they were much harder and I then drilled holes for the eyes and neck and cut off the extra resin that leaked out into the rest of two of the moulds with a scalpel. 
Once this had all been sorted and the heads were smoothed out, I set about painting them.

I have looked into how you can paint on resin by looking at forums and online posts by other artists that make things in resin. Apparently you can paint on resin with acrylic paint but it has a tendency to chip and flake off when handled too much, but if you use primer first it stops the paint from chipping. 


I sprayed each head with two coats of a matt finish white primer as the first coat peeled off a little as it got stuck to the board. After the second coat the all four heads were completely covered and once they were dry they were ready for painting. I gave each head a base coat of the main colour for their heads. The Rumpelstiltskin head will need a second base coat as the green isn't as thick as the other colours. I also made the Troll King's skin tone a little lighter as it looks too purple on my maquette and I think a lighter tone will be easier to duplicate for the silicon hands.


Once the base coats were completely dry, I started painting in the details and colours.


About Me

My photo
I'm Becky, although I do also answer to my surname- Gilby. I am a 22 year old Animation student at Leeds College of Art, specialising in Stop Motion Animation and Puppet making. I hope to make it into the stop motion industry making puppets.