Once the silicon had set, I took them out of the plastic and had to cut into the blocks for the second two heads with a sharp scalpel to get the plasticine heads out of the middle. I did them with zig zag lines so that the moulds can spring back into the same place. The two part moulds were just separated and cleaned when the second half of silicon had set. I didn't do a plaster jacket for the second half because the silicon was strong enough to hold its shape without a jacket, unlike the first half.


Once the moulds had been sorted, I made sure the Resin couldn't leak out by putting tape around the one part moulds to hold them together, and the two part moulds I had to secure by putting a wooden board on the non-plaster side and securing the mould together with an elastic band. I tried it without the wooden board but the elastic band pulled the silicon too tightly in the middle and left a gap at both ends so the board helped even out the pressure. Once both moulds were secured it was time to add the resin. Resin is very hazardous and so I had to wear goggles and gloves to protect my eyes and hands from possible splashes. To mix the resin, I first had to pour the resin into a cup on the scales, measuring out how much I needed to fill each mould. The catalyst was then added which makes the resin cure. I had to add no more than 2% catalyst, otherwise the resin will generate too much heat while setting and would turn it yellow instead of clear.
Once it was mixed, I poured it carefully into each mould and then took them to Leon in Metalworks to use the vacuum former to get rid of any bubbles that might have formed inside the mould. I only did this for the first two moulds as Andy said after this that, as I'm painting the heads, the bubbles wouldn't be visible as they will be right in the middle and never rise to the edges.

Andy has warned me that when resin has set it can still be quite tacky and sticky for a few weeks, but suggested that I could take the heads to Leon and ask him to bake them in the oven for 30 minutes which will stop them from being tacky. This will allow me to paint them sooner.


The four heads have come out of the moulds just fine, a couple of the have little issues but nothing that can't be easily fixed before painting. The Rumpelstiltskin head has a couple of air bubbles on his chin but they've just caused holes which I can fill in and cover with paint. The Millers head is missing a tiny piece of his moustache but it will be easy to level it out. The girls head easily came out the best and I think that is because the mould was the simplest and smoothest. The Millers head came out slightly yellow which is apparently what happens if the resin overheats while curing. This would be because slightly too much catalyst was poured in when mixing. Fortunately this wont affect my puppet as I will be painting over it.
I put all four heads in the oven in metalworks for half an hour then left them to cool down over the weekend.
Once they were cooled, they were much harder and I then drilled holes for the eyes and neck and cut off the extra resin that leaked out into the rest of two of the moulds with a scalpel.
Once this had all been sorted and the heads were smoothed out, I set about painting them.
I have looked into how you can paint on resin by looking at forums and online posts by other artists that make things in resin. Apparently you can paint on resin with acrylic paint but it has a tendency to chip and flake off when handled too much, but if you use primer first it stops the paint from chipping.
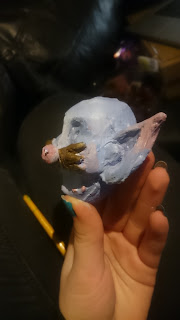
I sprayed each head with two coats of a matt finish white primer as the first coat peeled off a little as it got stuck to the board. After the second coat the all four heads were completely covered and once they were dry they were ready for painting. I gave each head a base coat of the main colour for their heads. The Rumpelstiltskin head will need a second base coat as the green isn't as thick as the other colours. I also made the Troll King's skin tone a little lighter as it looks too purple on my maquette and I think a lighter tone will be easier to duplicate for the silicon hands.
Once the base coats were completely dry, I started painting in the details and colours.


