Saturday 30 January 2016

Storyboards and Concept art.

Sophie Wright from Illustration has agreed to do my Storyboards and concept art/ set designs. 
I have sent her the version of the story that I am planning to work to and some images for the kind of look that I am hoping for. 


Here is the Pinterest board of influences that I sent to Sophie


Tuesday 26 January 2016

Clay Maquette of Rumplestiltskin

To begin my process of making the puppets, I first started by making clay maquettes for each character.

To do this I started by making a wire armature and secured it onto a wooden board. 


 I then carefully sculpted the character of Rumplestiltskin onto the armature with air drying clay.


Sunday 24 January 2016

Finished King design.


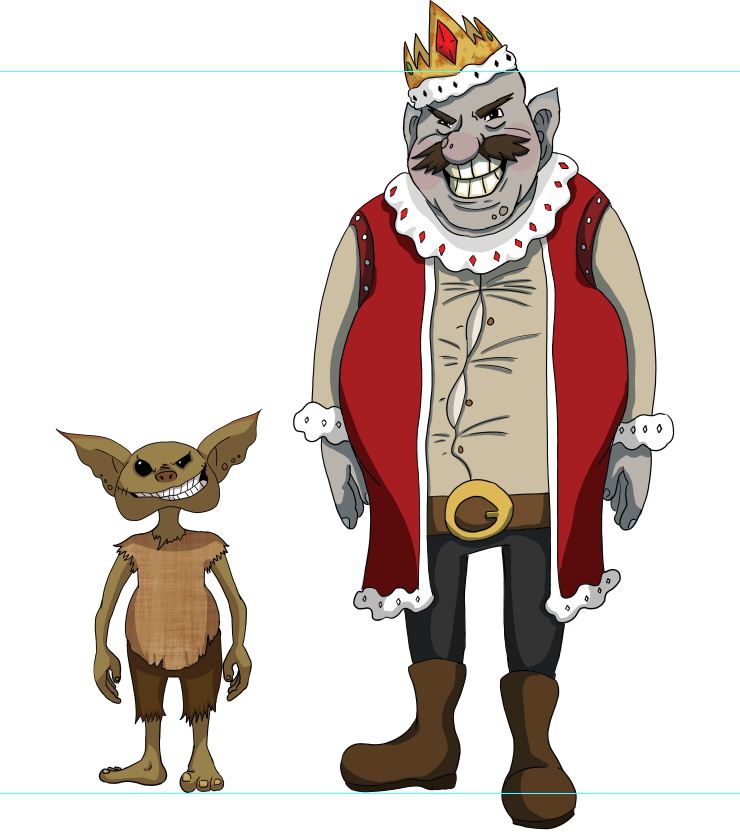
For this character, I asked Cara if she could make his skin a blueish grey colour, but with slightly rosy cheeks. The first colour image she sent me I thought was a little bit too blue, as I wanted him to look more pink coloured with a hint of blue, which meant he could have rosy cheeks.
The second time round I thought was much better.


I love the colours she has chosen. 
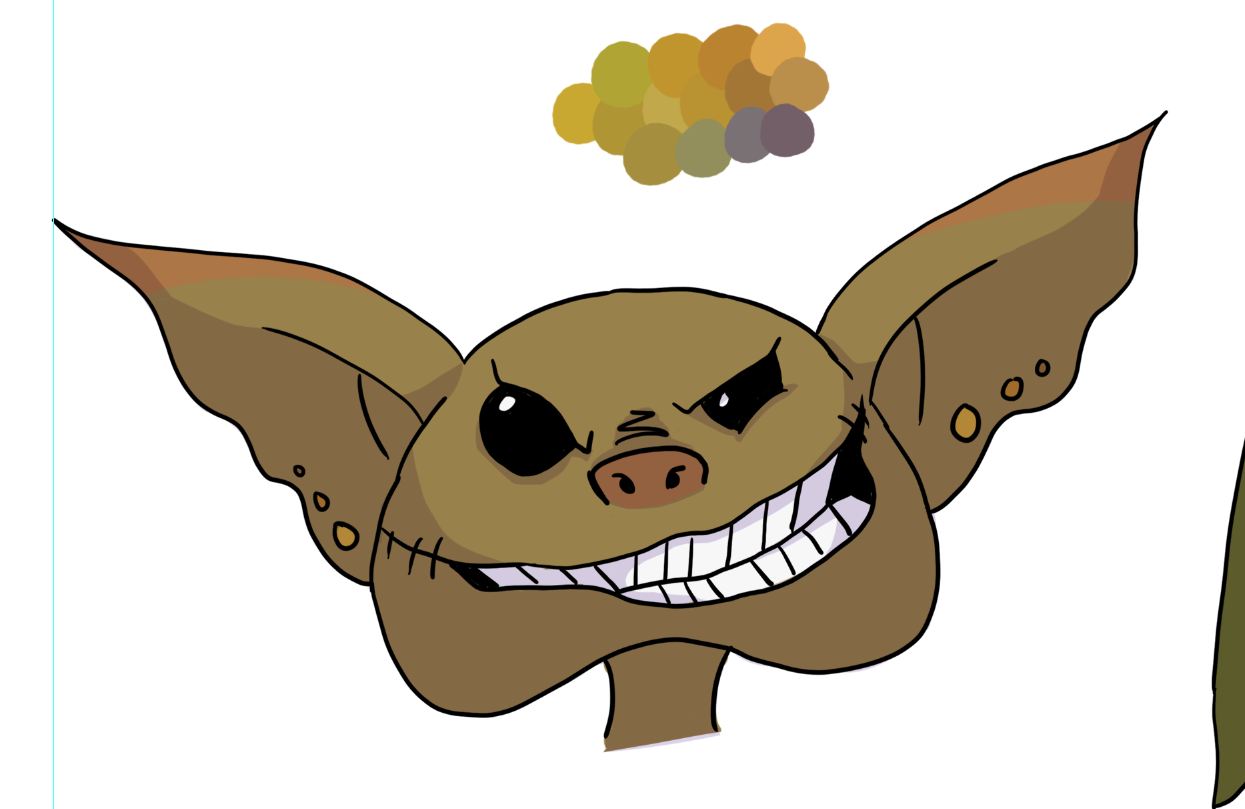
We then talked about the teeth, as I thought that, as a troll, his teeth shouldn't be as pure white as they were. I suggested making them a little bit more yellow instead.


These, I thought, were a little too yellow and suggested that we try white teeth that were yellowing around the edges, which lead Cara to this image. 


Once I was happy with the colours of the skin and face, we had some discussion about the colour of his cloak,shirt and undershirt. 


This was the first full colour image that Cara sent me. I liked the cloak, boots and trousers but I wasn't kdaeen on the shirt as the colours didn't look villainous enough for the menacing troll king. 


After a few tests, I suggested maybe trying a darker grey or purple and Cara tested out a variety of colour schemes making use of the colours I'd chosen.


 From these, I really liked the grey shirt with the purple undershirt, however I preferred the idea of a red cloak. The red cloak on the original drawing, however, was a bit too bright and I suggested finding a deeper shade of red, perhaps with a touch of purple to make it darker and blend well with the purpleish tones in the shirt and undershirt.


Saturday 23 January 2016

The King character design.

Cara is also designing the character for the King. I decided I wanted him to have Troll-like features while still being recognisable as human. I also wanted him to be quite fat.

He needed to be a lot taller than Rumpelstiltskin, so Cara drew this quick sketch to work out his body shape and compare it to Rumpelstiltskin's height.


 These were the first two designs for the King's face. She thought she'd try a curly beard. I suggested the nose needed to be bigger and the cheeks chubbier. We also then decided the try it without the beard.

This is the King without the beard. I think he looks better without the beard but suggested making the hair and moustache less fluffy looking.


Cara decided to get rid of the hair alltogether and made the moustache choppier. She also added warts to the face and slightly pointed ears. I think this is the face we will go for as he looks more menacing. 

She then tried a selection of different crowns to work out which one looked best.


The crown design that I decided on was the one below on the left as I thought it looked more old fashioned and villainous than the others without seeming too 'ice queen' as the middle one above looked. 


Having settled on a design for the crown and the face, Cara then started drawing up the whole body and deciding on the clothes. She drew a variety of capes and drew up some comparison images between the King and Rumpelstiltskin.


We finally decided he looked best with the more medieval style cloak in the last image on the right and Cara began adding some colour.

Thursday 21 January 2016

Planning the project

I have done a rough plan to help me get all of the work done on time by setting targets to have each task completed by. I did this by making a list of all the tasks I need to do and worked backwards from the deadline to make sure I left myself enough time to Animate. This should hopefully help me keep my project on target and will mean that I can give the people I am collaborating with a solid date for when I need each thing by. This plan can be adapted as there is a bit of a safety zone around each task in case things overrun. This also means I have the option to add more tasks that I might not have realised I needed to do yet.


The finished Rumplestiltskin character design


Here is the final design for Rumplestiltskin, by Cara.


Wednesday 20 January 2016

Considering Materials

I have started thinking about what materials I will be making my puppets from. 

I originally was thinking about doing them entirely in silicone, but that would be very expensive and my silicone skills need a lot of improvement as my Context of Practice silicone puppet did not work. 
Because of this, I debated making the puppets in latex foam like my puppets from second year, however I don't think they will have the quality that I desire for these puppets. 
I also want to experiment with resin to add new skills to my portfolio. 

I have decided that I will use clip foaming to pad out the puppets bodies, and make the arms (and legs that are on show) out of silicone, which will limit the costs as I will be using much less silicone. I will then make the heads out of resin which will allow me to paint them how I want them to look and use stick on mouths when animating. I will also need to practice my sewing as I will need to make the clothes myself. 

I have not yet decided how best to do the eyes for each character and will need to work out how to create facial expressions with eyebrows. 

I also still need to work out what material would be best for the Rumplestiltskin puppet in the last scene when he tears himself in two. At the moment I am considering making a plasticine duplicate puppet but I will need to do some tests.

Rumplestiltskin character design.


 Cara is doing the character design for Rumplestiltskin and the king, while getting feedback from me for the designs. For Rumplestiltskin, we were going for a little goblin look. In the first few designs I decided the goblin needed to be skinnier.


Then Cara tried some skinnier ones with the ribs showing. I mentionned that I needed the characters to have more of a neck to make them easier to animate.


 These two we decided were a bit too skinny, and decided that maybe the character could be quite slim, but with a pot belly. I also suggested changing the clothes to cover the stomach as I do not want to cast silicone over the whole body, which I would have to do if the stomach was showing.
The body for this one was perfect, so Cara went more into detail on this character, working on the face and the hands and feet more.


This sketch made me realise I needed Rumplestiltskin to be more of a mischievous character and needed to have cheekier eyes.


A series of colours for Rumplestiltskin's skin. I decided the lighter goldy colour was what I wanted.


This is Cara's full body outline for the character, we decided to try having three toes instead of 5, and having three fingers to go with it.


About Me

My photo
I'm Becky, although I do also answer to my surname- Gilby. I am a 22 year old Animation student at Leeds College of Art, specialising in Stop Motion Animation and Puppet making. I hope to make it into the stop motion industry making puppets.